Showing posts sorted by relevance for query wind in my hare. Sort by date Show all posts

Friday, November 6, 2015

Wind in My Hare PT 1

Rabbits...Hares

I believe that most of you are most familiar with my Chinese dolls...well...actually, I have been creating rabbits-hares longer than my Chinese dolls!!

Rabbits or Hares just happened...I created one rabbit doll and...well you know what they say about rabbits! 

Moon rabbits, Fair Hares, Wind in my Hares..

Inspiration :Wind In My Hair

MANY years ago '96' or '97, I was with my friend Joyce in Baltimore. We were fortunate enough to discover the American Visionary Art Museum...and we were we fortunate that we were able to see their a new exhibit "Wind In My Hair".

Joyce and I were stunned at the pure emotion that came from these outsider artists. 
A label created by French artist Jean Dubuffet to describe art created outside the boundaries of official culture; Dubuffet focused particularly on art by those on the outside of the established art scene, such as psychiatric hospital patients and children.
While Dubuffet's term is quite specific, the English term "outsider art" is often applied more broadly, to include certain self-taught or naïve art makers.
Joyce and I felt their joy in their unbridled creations, having to create no matter their circumstances. I have been fortunate to revisit this museum for several exhibits, each one very compelling. It is one of my most favorite museums in the world!

Definition :Wind In My Hair

HA! I searched for the origin of this saying and came up with nothing...nada! So here's my shot at it...

Wind in my hair: 
to get outside
let your hair down to feel the breeze 
freedom
Photography: Mark Mortensen

Play on Words :Wind In My HARE
I love the play on words. So I took that inspiration and (un)know definition and put them together to create a rabbit...a HARE in motion feeling the wind in his hair.

My first Wind was created shortly after our visit to the AVAM at the end of the 1990's. I have made several Wind in My Hares within this series: on a  3ft wingspan plane, on a bike, on skis, and of course on skates...

In the weeks to follow:
~Wind's Costuming
~Wind in Detail

Want more HARE???

Friday, February 6, 2015

The Seahorse & the Hare #1

Ha! I just thought of this while I was writing this post...it is usually The Tortoise and the Hare...

I love doing rabbits...and yes, I need to show you more of these someday...I love a play on words.

I have done these Hares for years with Series #1 Wind in Hare- (get it) Rabbits in motion- which I will include this one is that series. I have made them on roller skates, on planes, on skis, on bicycles...anything in motion or with movement of hair (hare that is).

Series #2 Moon Rabbits- Japanese hares, and Fare Hares- sweet rabbits.

The Hare

For this commission piece I was ask to do a scuba diver in a whimsical manner. Love that! I like my hares to be just fun and with plenty of character.

I knew this rabbit needed to be in wetsuit...which I will cover in this posting...

Here is Harry...in all his fullness.
Harry-Wind in my Hare©: Leslie Molen
Photography©: Mark Mortensen
Working photos by Leslie


While designing this piece, I originally thought about the whole shebang... the tank, bc vest, mask...etc etc...


But would all that extra stuff add to my story or diminish it? 


I decided in this case less is more...just the wetsuit. I would lose the connection between the Seahorse and the Hare with all the other stuff in competition around it! 

It is more important that your eye zero in on the story..the "human" element of the relationship of the Seahorse with the Hare than how proficient could I make a scuba tank!

I will cover more of expression and relationship in next week's posting.

The Wetsuit

This may be more info than you "signed up" for on wetsuits. I feel that when you are creating a piece from a reality, you want to capture the essence and clarity of  your story. You can take the highlights from a chosen garment and bring them into the piece your are creating. I find that if you try to replicate everything exactly it is very easy for your piece to become overworked. Of course, if you are doing exact replications- that is a different story.

I went online to find a nice photo of a wetsuit. The wonderful thing is that my husband, Mark, and I dive, so I know what a wetsuit looks like and how it feels.

I purchased a nice weight black poly with a bit of wool in it. I found that it still was not stiff enough. I didn't want to add thickness but needed stiffness, so I lined it with a heavy weight iron-on stabilizer. Which worked for me in two ways, to add stiffness and also to keep the edges of the wool from fraying.

I decided that I wanted also to have that overlock effect and actually pieced this together as a "real" wetsuit would have been made. I choose to simplify the amount of pieces for scale.

Next, was is where I can bring in a play on words- how perfect is this! ha!
 BARE wetsuit brand became...

Most people who dive use a 3mm or if you are like me and do not want to chance being cold a 5mm (mostly women use these!)
Of course, I would have to add this to the sleeve area, as would be a standard.

Next was creating the back zipper. Most wetsuits have a long nylon webbing strap to pull up your wetsuit yourself...
I found that while the wetsuit was on Harry, I had to hand-sew the zipper in place to get a nice streamlined fit.

Final touch would be the booties.

I did use a fun foam "rubber" sole and with artistic license made the zip up in the back!


Next week- The Hare's Expression & Connection-Relationship
Following Week- The Seahorse up close and personal!

Friday, February 20, 2015

The Seahorse (and the Hare) #3

Last week, I discussed expression with the Hare...carrying that theme along into the Seahorse with its expression and positioning.

Harry & Seahorse-Wind in my Hare©: Leslie Molen
Photography©: Mark Mortensen
Working photos by Leslie

Consistency

The Hare was created with a stone-clay head covered with stretch velvet and sewn body. I like to keep the consistency of both pieces the same- congruent.

Color and Design

My initial concept was to have the seahorse in blue- as in the sea...ocean. I pulled out my dupioni silk in my blues and it just was not quite there...put the fabric to the side on hold.

I looked up a seahorse and found this image in beautiful shades of greens and yellows...

These colors just spoke to me, I kept pulling out the blues...but the greens and yellows was were my heart was telling me to go. Gotta listen to your gut.

Now to understand the anatomy. I believe that it is very important to have a good foundation of knowledge of the anatomy of whatever you are making and then you can jump off into your own personal style.

Next was to continue with the consistency and so I sculpted the seahorse head and trunk from stone-clay. I know! Looks a little rustic right now!

My sculpt needed to dry and then a light sanding prepping it for an overlay of silk dupioni.

When sculpting for an overlay of fabric, you need to make some of the features a bit more exaggerated to make up for the fabric thickness.

I next sewed the tail in the green dupioni which is stuffed and armatured with the extra fabric at the top of the tail that I ran that up the back and into the horizontal and vertical grooves that I made in the clay.

Then rolling the fabric up over the head and around the "snout" then I applied another overlay of the yellow in the tummy area.

Expression

Next, came the painting of the eyes, which mimicked the surprised look of the Hare. Darkened the interior of the mouth for more depth. OOoh!!

I needlesculpted the tail area to create the ridges. Then, added chalk coloring around the snout and defining the ridges of the body areas. 

The trunk ridge was made from a ribbon that I trimmed off the picot edging and colored it green and tipped it with black.
The delicate fins were made from vintage netting and tipped, again, with black.
 

The tail shape was important to give this seahorse a little bit of spunk..


Finally, nestled into the Hare's hands and position for the complete connection between the two!


Thursday, March 11, 2021

New Moon Rabbit Part 1

If you have been with me for some time, you know my natural gravitation towards Rabbits and Hares...it may of started with "Wind in My Hare"...perhaps earlier, with a Series I did for Kaiser Permanente with Rabbits from around the World in wool, cotton, and silk.

I am ME.

As life and art can inner mesh, I find that the place I am now in my life is one of joy and most importantly the feeling of being safe. I won't delve TOO much into that...but my foundation of the ability to know and be "me" has finally now being able to express this in my art.

Divine Connection.

My second thought that I feel important to share is a solid connection with the Divine. I truly believe that art in any form is already out there in the ether and it is that particular artist that is able to reach up and connect. Once you have your soul open to receive that is when the *magic* happens. And if you are able to relax...well...maybe the better word is to breath into the flow of the piece, it will just come out of you...it will always tell you what direction to go. You just have to let it create itself into our reality.

I find most times, at the end of creating a piece, I look at it and think how did that happen?? I know I was there but really don't remember it happening!

Art like life is always a journey...and if you are growing you are stepping out of your comfort zone on a regular basis! It is in these moments that our person can change (for the better) and hopefully from our soul, it "bleeds" into our art.

I have created many rabbits/hares and many dolls...but this time it is different. I find it is now my whole soul's voice that is creating...and with that comes my series for 2021- Of Heaven and Earth". It will be a combination of my Rabbits and my Women. Specifically, Moon Rabbits and Ito Women..

Ito meaning as connection with one another...taking on the characteristics of my beloved Asian Symbolism in a new way (from my Story Hat pieces).

Onto New Moon Rabbit...


She is the first one out in the Series...and with that she appeared as the New Moon. Over the next few postings, I will take you through her process... better yet...her manifestation into this present time.

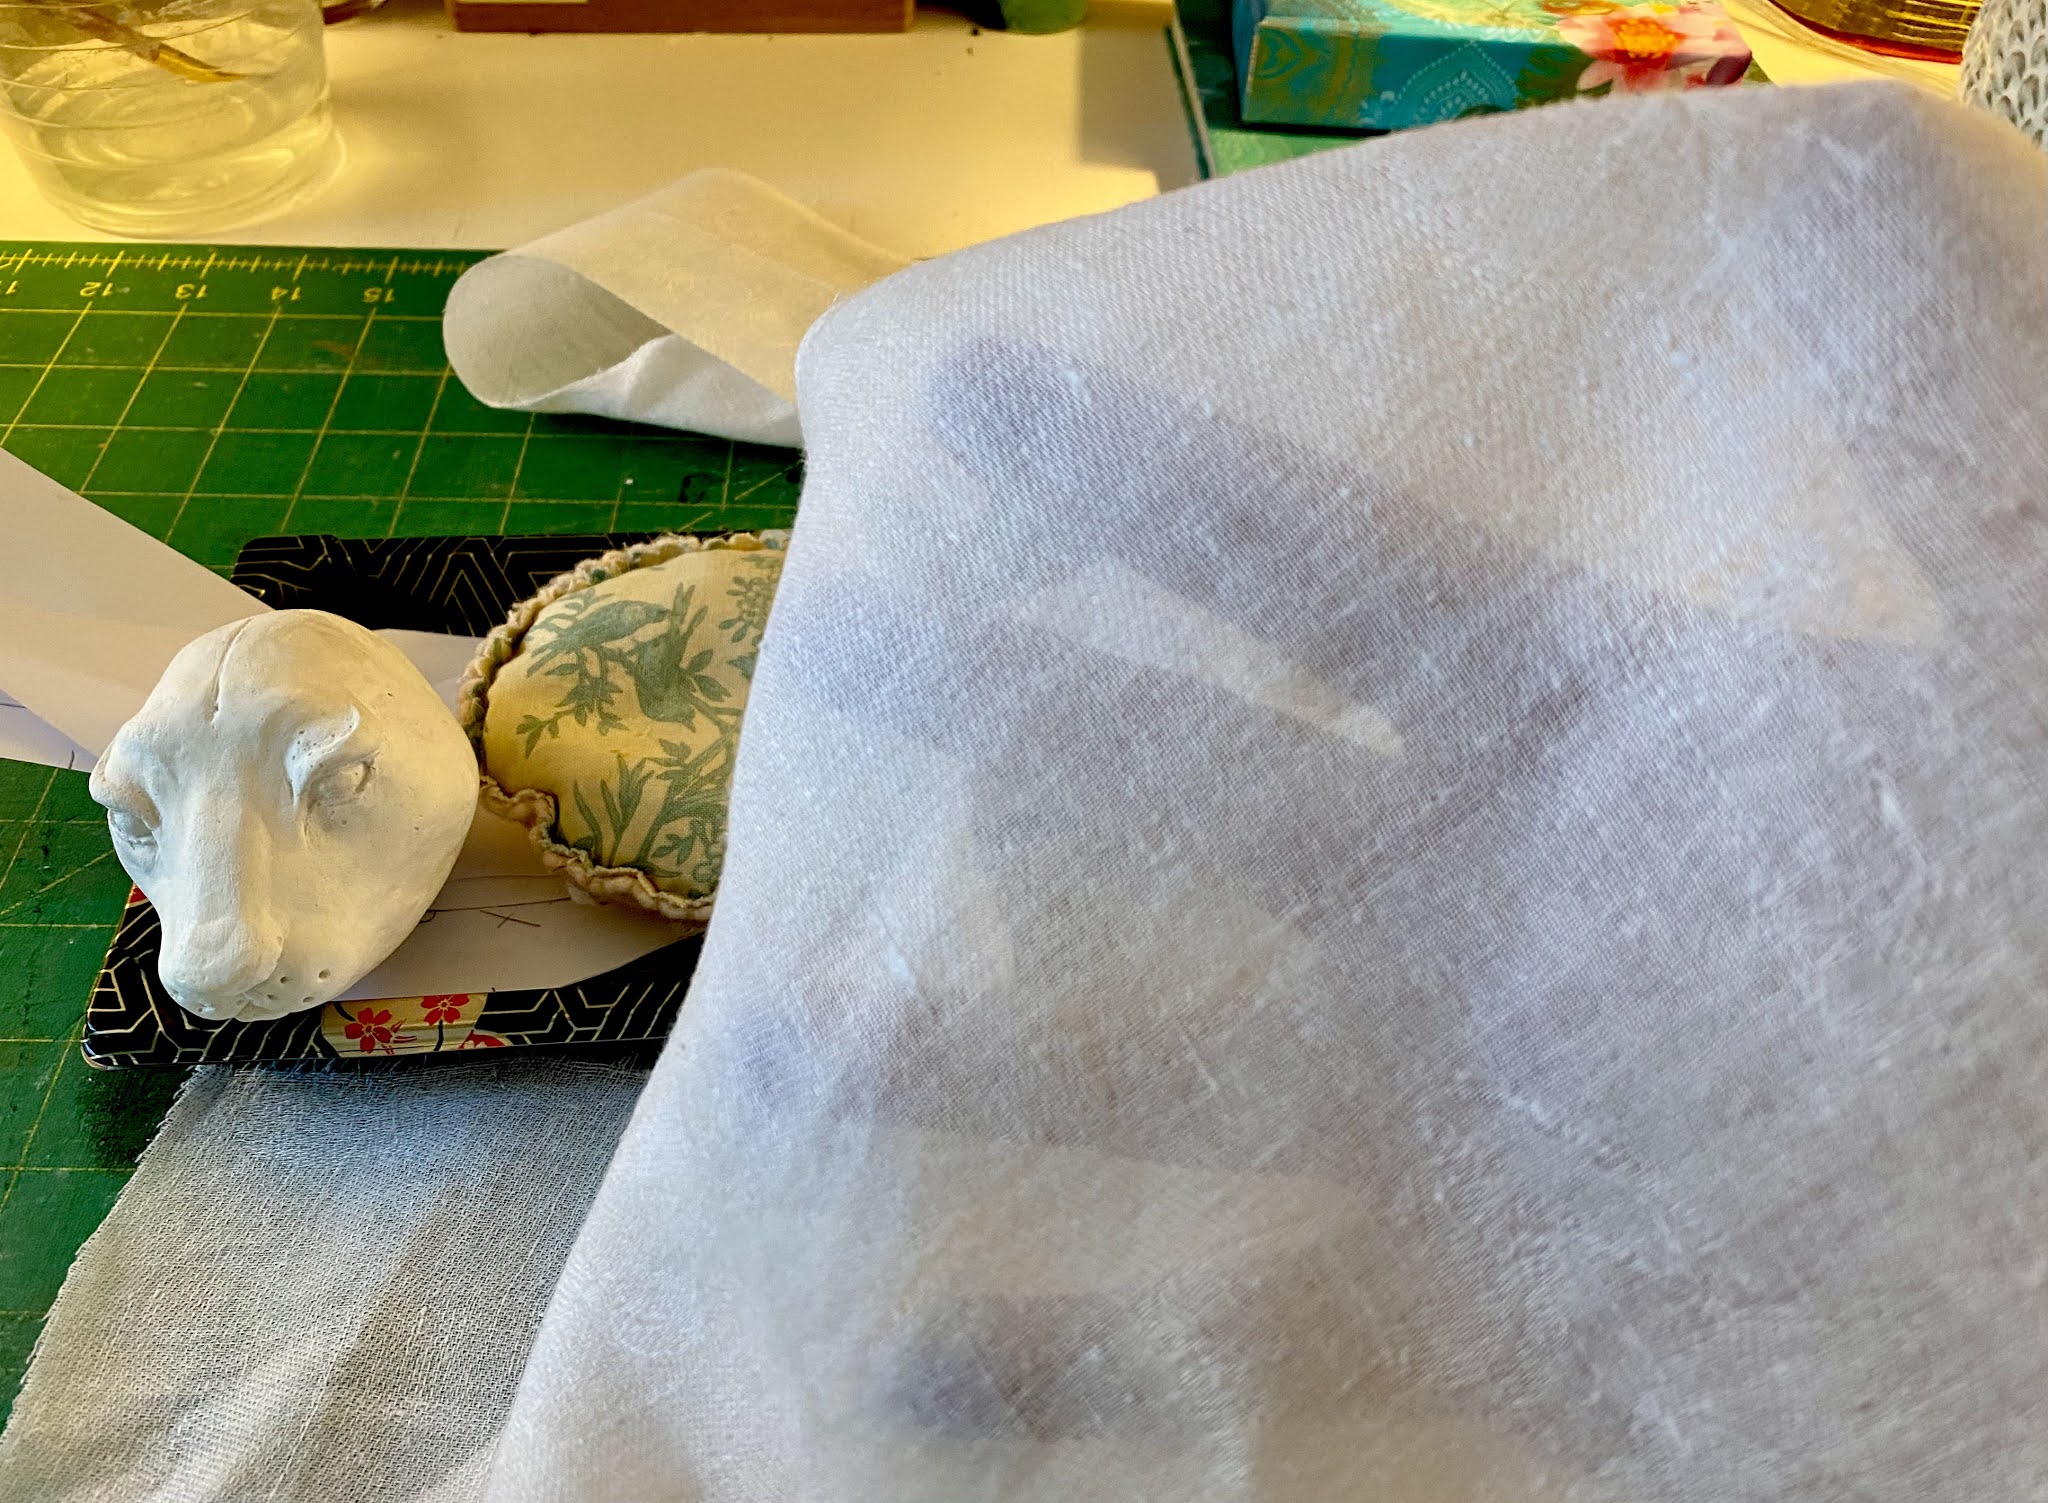
She started, as all my pieces do, with her head sculpt. I use DAS air-dry clay...and three very simple tools. 

A chenille needle for fine detailing, a blue handled traditional sculpting tool, and a soft tip manicure stick...oh yes, and my hands!

As I now know the size of the head, I can now draft the pattern of her body.


After the head is thoroughly dried, I do a light sanding. Since I cover my heads with fabric...I like the sanding to gently tease the surface so the fabric will adhere firmly.
For these piece, I chose a vintage linen that has a barely visible damask weave within it. This fabric is very sheer with no stretch to it. It is really lovely for this project as I want to project a feel of an old worldly being, balancing the rustic with the finished.


Below, the head covered in the linen damask. I love the beauty of the texture!


Since the vintage fabric is so sheer, it is necessary that I lined it, I use a cotton batiste.

Body sewn and prepped for dying...I started off with just tipping the fingers, toes, and ears...and...

Next week the FULL DYE!

Friday, December 4, 2015

Wind in My Hare PT 3 Details


It is a natural part of my nature to zero in on the details. In life and in creating one of my pieces...I love all those tiny little things that work together to create a whole...I love discovering the connection from one piece to another.

I believe when creating an original piece the importance of actually being original, from you, being made by you. Which goes to the details and looking at each part of your piece as unique and made by you.

Wind in my Hare in Detail:
Photography: Mark Mortensen

Head:
I sculpted the head from DAS air dry then overlayed it with velvet exposing the eye, nose and mouth area to hand paint.

Below is a very close up of the eye, nose, and mouth painted with several layers of acrylic paint and finished with gloss. Eyebrows are embroidered.
Shadows are created with chalks and liner is done with coal pencil and fine line marker.
 

When sculpting I make small holes for the horsehair whiskers which are added close to completion of the pieces. The whiskers are then steamed into a breezy position.

Movement:
The positioning helps create the movement, then I add the clothing and how it would react in the wind.
Part of creating movement is choice of fabrics, with dupioni silk as a the jacket liner with the ability to hold shape. I pretty much, let the fabric determine where it wants to go. These rolls are held into place with tacking stitches.


The pants are of a soft wool. I wired the hem of the pant legs to hold this look.

Button, button...
Little hand punch leather buttons line up on the jacket.
Note: even the buttons are hand made.

Red leather button with linen pick-stitch for the pants opening.

Boots and Skates
The boots are from leather with linen ties and bottom linen soles. Top-stitching sets the top part of the boot from the toe.

Skate strapping is also top-stitched and a small buckle is added for a secure roll around the block!

The skates themselves, have many components/ details to them...
Below photo of pieces and parts...this is enough for two sets.

The bottom of the skate shows the metal plate with wheels.

All together now..

With these details all together, it create one fine rabbit out for a roll in the sunshine!

WOohooOo...
Look out World here I come!


Related Posts Plugin for WordPress, Blogger...